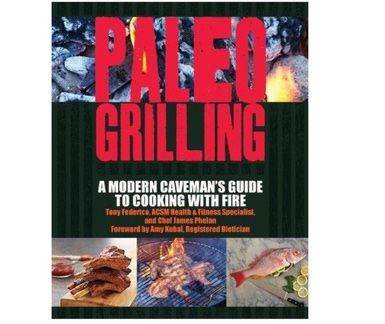
This is the last post in my series of guest posts this summer. We have had a really busy summer and I am so grateful for all of my friends and colleagues, that helped me out by creating inspiring content for you! I invited my friend, Tony Federico, author of “Paleo Grilling: A Modern Caveman’s Guide to Cooking with Fire” and blogger at LiveCaveman.com to share some grilling tips with us here. You can also connect with Tony on Instagram!
I am a little embarrassed to say that I am a novice when it comes to grilling. My dad is a grilling master. Seriously! So, no one was ever allowed to help, even when there would be well over 50 guests at my parents house. I blame him for my lack of grilling skills. 😉
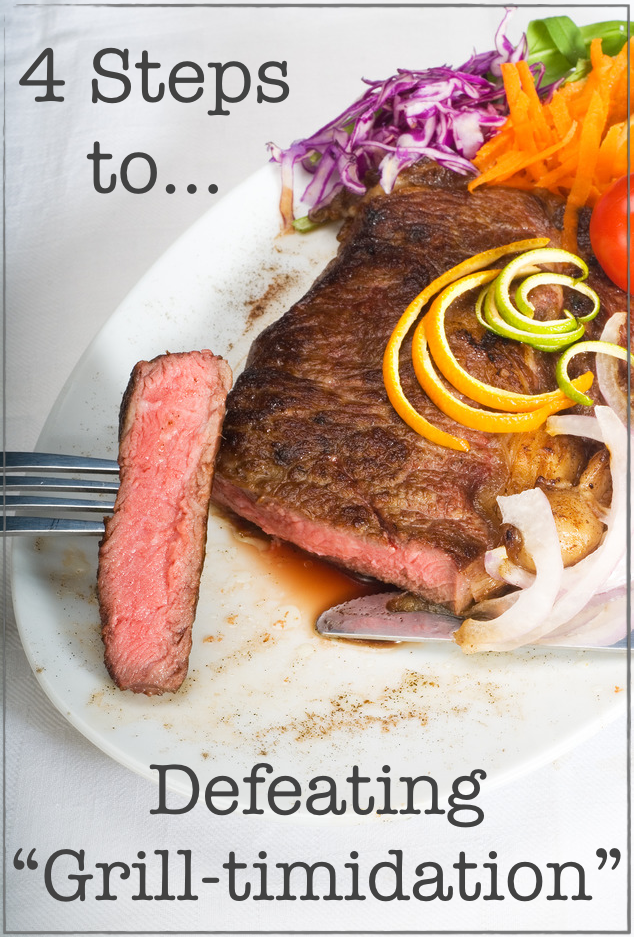
Paleo Grilling
4 Steps to Defeating “Grill-timidation”
The grill, unlike other cooking implements, is typically the domain of the “man of the house”. He approaches the prospect of a cookout like a military campaign, troops (aka “buddies”) are rallied, supplies are shipped in (“Honey, can you pick me up some coals and lighter fluid?”), weapons are unsheathed (“Where did I put those dang tongs?”), and, emboldened by the smell of blood, and perhaps one too many beers, he faces the inferno. After the smoke has cleared, the proud warrior emerges victorious with sizzling steaks and one badly singed eyebrow.
Sounds scary right? Well, the truth, like fishing stories, is often a matter of interpretation and the truth about grilling is that it’s no different that any other manner of cooking. On one side you have “heat” and on the other side you have “meat” and with a few simple steps you can put those two together with minimal time, stress, or risk of injury.
As they say, knowledge is power and practice makes better, so put on your mitts and prepare to knockout Grill-timidation once and for all!
Get Your Own Grill
Grills, like cars, are very personal possessions and the Grill Master and grill share a special bond. Therefore, as a fledgling Grill Master yourself, you need to seek out and find your own grill. But, how do you know which grill is right for you?
Gas Grills – If you anticipate grilling on a regular basis (by this I mean more than once a week) a gas grill is probably your best bet. They fire up quickly and you can get multiple grilling sessions off of a single propane tank. Tony’s Pick: Weber Spirit
Kettle Style – If you are a traditionalist, and like to keep things as simple and pure as possible, a standard kettle charcoal grill is what you should go for. These iconic grills require a bit more work to get started, but once you fire up those coals, you’ll understand the allure of grilling. These grills, because of their simple construction, are also the most affordable. Tony’s pick – Weber One Touch
Kamado (aka Egg) Style – If you think you’re the type of person that likes to “go big or go home”, you’re going to want to take a look at the kamado style grills. These grills look like big ceramic eggs and because of their unique shape and heat retention properties, they are perfect for grilling as well as smoking. Tony’s pick – Big Green Egg
Once you have your own grill, take the time to read the instruction manual, set it up, and fuel it appropriately (lump charcoal or gas). If you purchased a kamado or kettle style grill, you’ll also need a chimney starter. This simple device will allow you to start your coals with newspaper rather than lighter fluid and is an indispensable grilling tool.
Begin with Beef
Now that your grill is all set up, it’s time to cook. You want to start with something that’s simple, flavorful, and forgiving, in other words, steak.
The quality of your steak is paramount, and I suggest a good grass-fed ribeye to start. Ribeye steaks come from the “rib primal” a cut of beef near the upper rib cage. This part of the cow’s musculature doesn’t do a lot of heavy lifting so the meat is nice and tender in addition to being marbled with fat. This marbling gives a ribeye great flavor and also makes it harder to mess up. I also suggest a “bone in” ribeye that is at least 1” thick. Meat with bones in it always taste better and besides, there is nothing more Paleo than gnawing on a big meaty bone!
Season it Simply
When you buy good meat you want to show it off. Rub the ribeye with olive oil and sprinkle it generously with coarse ground sea salt and freshly ground black pepper. Down the road you may consider marinating your meat, but for now, this simplest of seasonings will serve you, and your guests, the best.
Sear and Cheer
After you’ve started up your grill and seasoned your steak, the only thing left to do is to cook that sucker up. You want to wait until the flames have died down and your coals are nice and white with ash. If you are using a gas grill, you want the heat to be “high”, set around 400 degrees Fahrenheit.
Place your steaks directly over the coals and let them be. Seriously, this is the easiest thing in the world to cook! For medium-rare, the steaks should go for about 8 minutes per side. After the first 8 minutes is up, flip the steaks and let them cook for another 8 minutes. After that, remove the steaks from the grill, set them on a plate, and let them rest for about 10 minutes covered loosely with aluminum foil. This rest period is critical because it allows the juices in the steak to redistribute through the meat and will keep them from running out onto your plate as soon as you cut into it.
After your guests bite into that perfectly seasoned, boldly beefy, and amazingly juicy steak they’ll swear you have been grilling your whole life!
For more information about paleo grilling, as well as over 100 great Paleo-friendly grilling recipes, check out Tony’s book, “Paleo Grilling: A Modern Caveman’s Guide to Cooking with Fire”